
Cases
Create a Case for a customer issue
A Case is a ticket for tracking a customer issue, its owner, and follow-up until it is resolved.
Before you start
Already logged in to the workspace and have the necessary permissions.
Step-by-step instructions
Follow these steps in order. You can keep this guide open while working in another Tautiva tab.
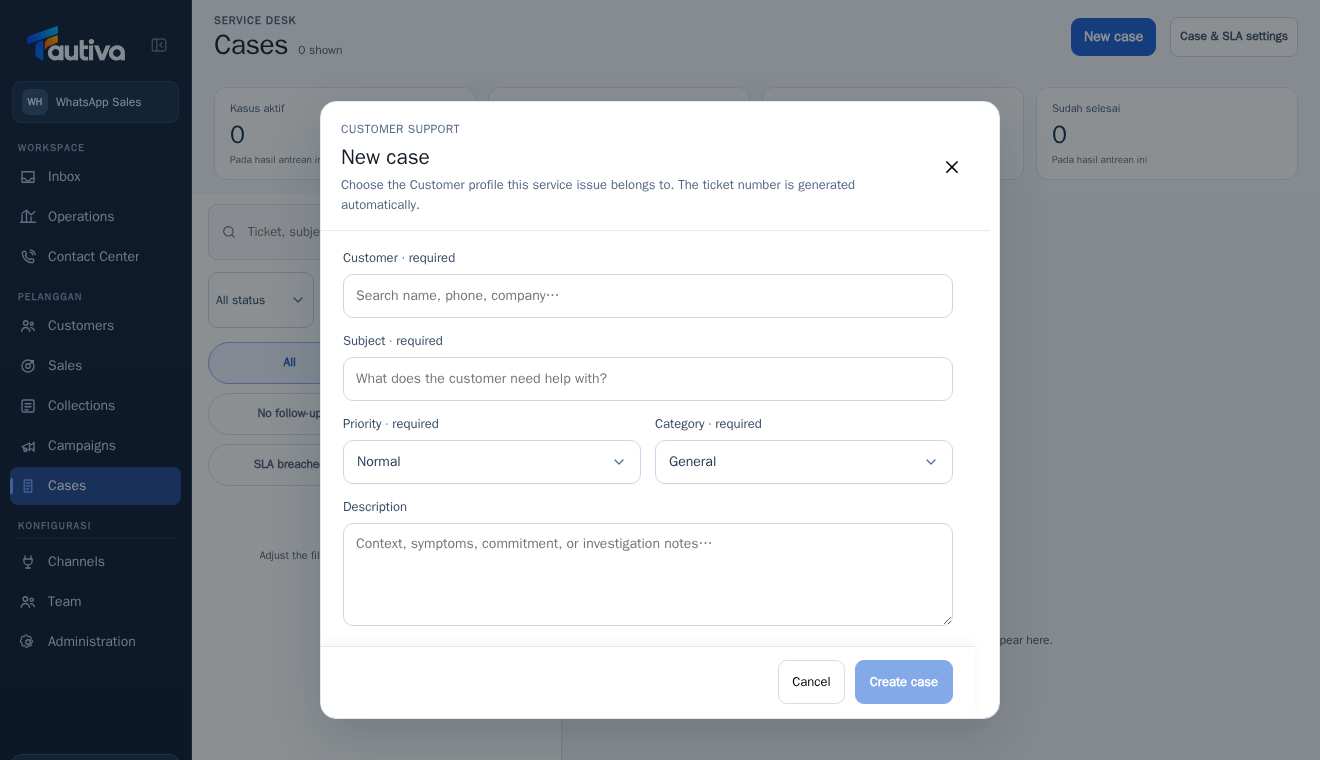
Open the Cases menu and click New case.
In the Customer · required field, search for and select the correct customer.
Fill in the Subject · required field with a concise summary of the issue.
Choose the Priority according to the level of urgency (Low, Normal, High, or Urgent).
Select the appropriate Category · required field, then enter a Description if necessary.
Review the content again, then click Create case.
Note the automatically generated ticket number for easy follow-up.
PRACTICAL EXAMPLE
Example from daily work
Example: a customer reports receiving a damaged product. Subject: 'Product arrived damaged'; Priority according to impact; Category follows team settings.
This is a fictional training example. No real customer data was used.
Expected result
A new ticket is saved and has a ticket number in the workspace.
Important notes
- Do not use Urgent for all issues; follow the priority according to the impact.
- Choose the correct customer so that the Case history is not mixed up.
If something goes wrong
- Can't click Create case? Check the required fields: Customer, Subject, Priority, and Category.
This guide describes the interface reviewed on 13 October 2026. Documentation testing did not send real messages, invite users, process payments, or modify real customer records.