
Team & administration
Get familiar with Administration
Administration manages company settings, workspaces, access, and features available under the plan.
Before you start
You have logged in to the workspace and have the necessary permissions.
Step-by-step instructions
Follow these steps in order. You can keep this guide open while working in another Tautiva tab.
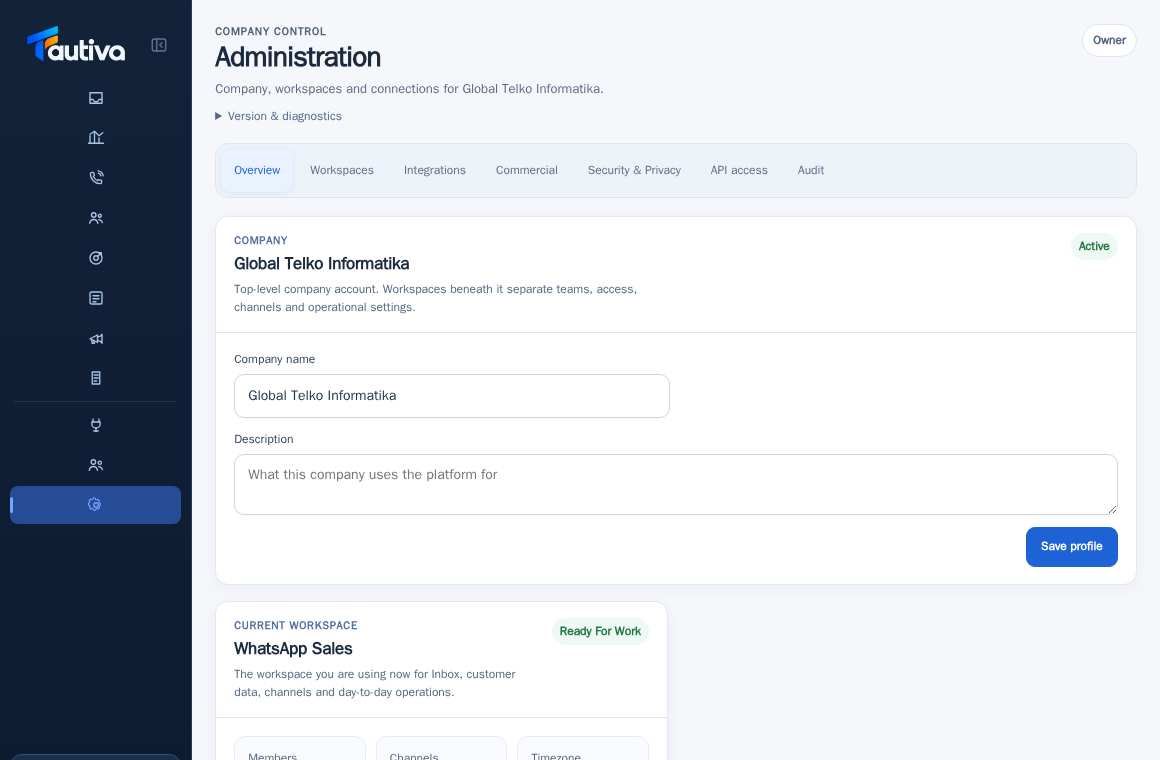
Open Administration from the side menu.
Check the Company name and Current workspace; ensure they are not mixed up.
View information on Members, Channels, and Timezone.
Under Available product features, check if the feature is Available or Not enabled.
Use the Team, Channels, or Case & SLA settings links for the relevant configuration.
Do not change the company profile if you are unsure of the impact.
PRACTICAL EXAMPLE
Example from daily work
Example: the owner checks package capabilities to understand which modules are truly available in the workspace.
This is a fictional training example. No real customer data was used.
Expected result
Changes or information are displayed on the screen according to the actions taken.
Important notes
- Not enabled means it is not active in the package, not necessarily a system error.
- The Read Only status on a section means that section can only be viewed by the account being used.
If something goes wrong
- Not enabled feature? Check entitlement; this is not always a technical issue.
This guide describes the interface reviewed on 13 October 2026. Documentation testing did not send real messages, invite users, process payments, or modify real customer records.